
Dyeing Mercerized Cotton Socks with Rit
- Mercerized Cotton dyes differently than regular cotton. The standard Rit recipes will yield different colors with mercerized cotton (different hues and darkness) than described because they are based on standard cotton.
- The ratio of dye to clothing matters: the dye bath is not an infinite source of color, but will become exhausted after the article being dyed reaches a certain color.
- The amounts of non-water ingredients, their ratios to each other, and to the amount of clothing being dyed are important; the amount of water mainly affects the ease of stirring the mixture
Introduction
For a long time I had a favorite brand of socks, Gold-Toe Cotton Fluffies. They always were nice, beefy cotton socks that stayed up and were well-made. For various reasons, most notably multiple corporate acquisitions, these socks are not what they used to be. (Witness the many disgruntled long-time customers and their crotchety Amazon reviews.) But they are still some of the best casual-yet-classy socks I can find.
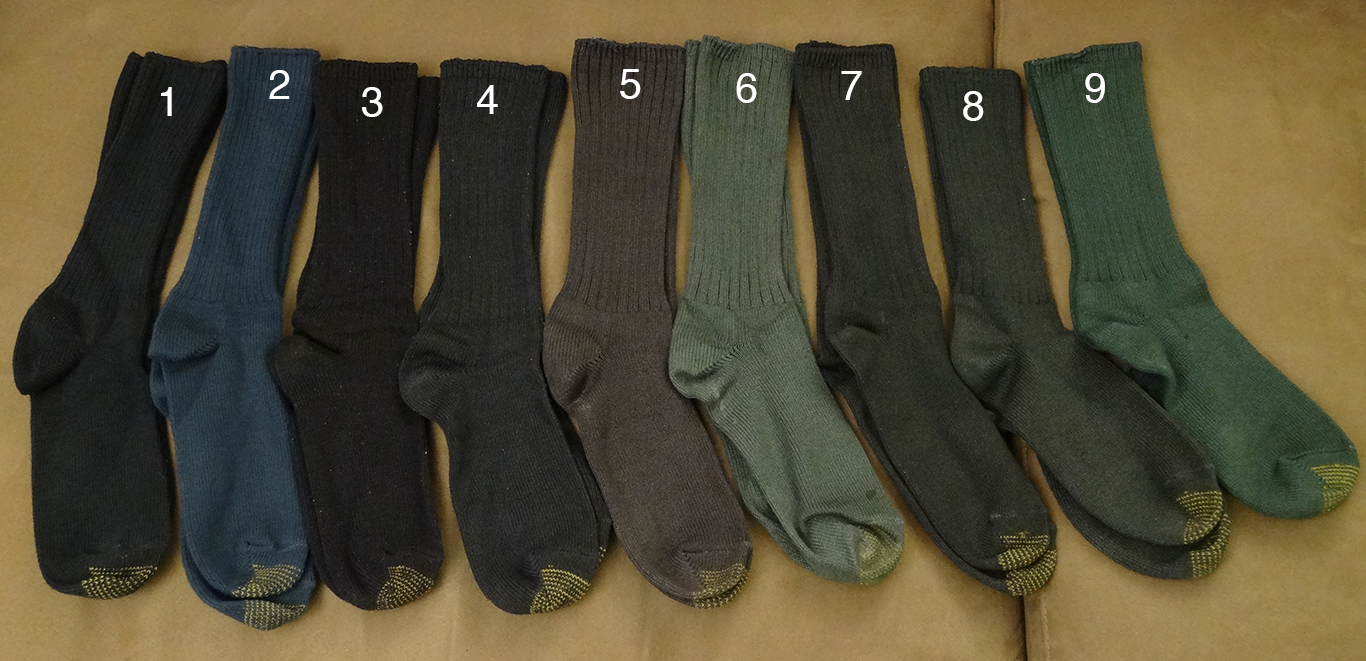
The main downside for me nowadays, is that they have abandoned the really nice-looking colors that they used to have in the 90’s, for the World’s Most Boring colors–Black, Brown, and Blue. Not the end of the world, but very lackluster. You can buy an olive pair of socks, but only if you buy it with two other disgusting colors in a 3-pack.
So, being an engineer who makes stuff for a living, I decided to make the colored socks that I want. Thus began the Sock Dye Experiments.
Discussion
At first I naively thought that by following the standard recipes on ritstudio.com I could just make olive-colored socks and be done. But real life seems to be a little more tricky. After many trials here’s what I’ve learned.
As summarized above, Gold Toe socks use mercerized cotton. This kind of cotton accepts dye much more readily and differently than regular cotton, and so the standard Rit recipes will not apply. Colors in mercerized cotton appear much darker (“vivider”) than regular cotton. Also, the Dark Green Rit color I was using always seemed to come out looking dark blue in my socks. I switched to Kelly Green Rit in order for my mercerized cotton socks to actually look green. The Dark Brown seemed ok–an attempt using Rit Tan just looked more green.
Also, I assumed that the hotter the temperature the better, short of boiling. The first couple of batches I dyed were probably at about 160ºF-170ºF. Rit recommends 140ºF. This would’ve been ok, but for one strange caveat: there are some nylon threads in Gold Toe socks running through the cotton knit. Normally these are unnoticeable, but in the dye mix (dark green and dark brown) that I was using, the hot temperature somehow made the nylon take the dark brown especially. So the resulting socks looked predominantly super dark green/blue with visible tiny brown nylon threads running throughout. In general, nylon takes colors better at hotter temperatures. I ended up measuring the temperature with a cheap meat thermometer, as this ensured a consistent procedure (and color!)
The last important thing I learned is that the dye will get eventually exhausted based on the ratio of dye to article being dyed. If you have the amount of dye correct based on the amount of fabric you are dyeing, you can dye the article for a long time (60 minutes, for example) and the color won’t get much darker than the normal time (about 30 minutes.) At first I thought that as long as you have more dye than fabric everything will be ok, but I soon learned that this can often lead to colors that are much too dark unless you stop the dyeing process very early. Better to put the right amount of dye and the right amount of fabric, so that the final color has a natural stop point. And by dyeing longer, you can ensure that the dye penetrates your fabric well and the color is as vivid as possible.
The final procedure that seemed to work well is summarized below:
Equipment
- 4-gallon stainless steel stock pot
- Stainless steel tongs
- Cooking thermometer
- Set of tablespoon measuring spoons (for dye)
- Measuring cup (2-cup at least) for salt / water
- Measuring pitcher or water bottle (for gallons of water)
- Stainless steel bowl to put socks in temporarily
- Stove-top range or hot-plate
- Rubber gloves
- Old clothes you don’t care about getting dye on
- Drop cloths or newspapers (to protect floor)
- Plastic trash bags (to protect your counter top)
- Aluminum foil (to protect your stove top)
Ingredients
- Rit Dye (multiple colors may be needed) Use the liquid dye for ease of use.
- Salt (if dyeing cotton or cotton blends)
- Vinegar (if dyeing predominantly nylon)
- Dish soap (just a dash in each batch)
- Water
- Rit Color Stay Dye Fixative (to prevent colors from running or fading)
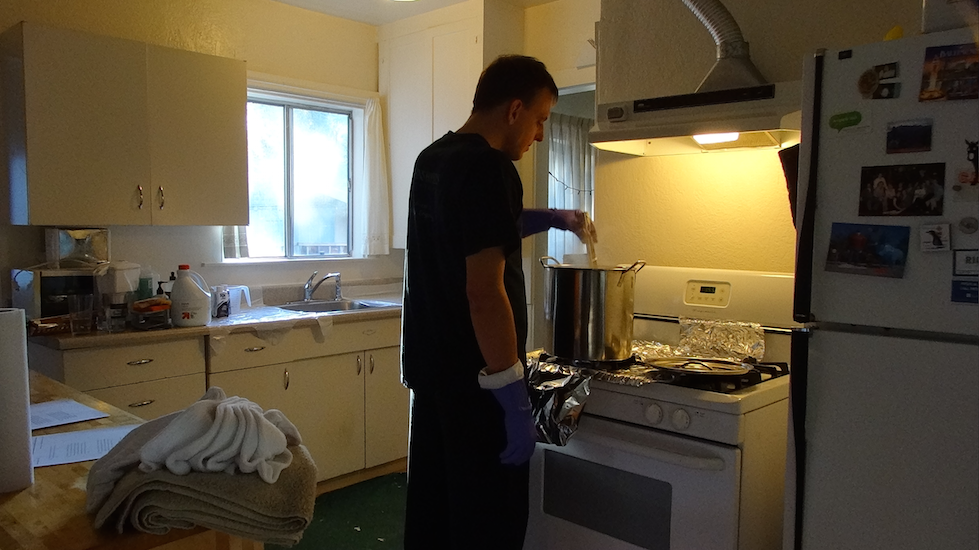
Procedure
The procedure is very much the standard procedure as summarized on the side of the Rit bottle or on ritstudio.com. In addition, some tips that I found out the hard way are summarized on pages 2 and 3 of this ritstudio reference.
I’m not exactly sure what is in the Rit dye. Which is why I bought equipment (pot, measuring spoons/cups, utensils, etc.) that I’ve solemnly promised myself will never be used for food. Dyeing yes, other mad laboratory experiments maybe, food No.
Get the water to a stable proper temperature first, before you start making a mess with the other ingredients. By using the thermometer and waiting for the temperature to stabilize, you can tell what setting on your stove top will keep the mixture at about the right constant temperature. Keeping a constant temperature of 140F will ensure more consistent results.
For dyeing cotton, the instructions seem unclear as to when to add the salt or if it matters when you add the salt. I just put the salt/water mixture in after I put the dye in.
Be sure to stir the dye mixture well with the tongs before you add the fabric to be dyed.
The dye will stain pretty much anything that isn’t stainless steel, so cover anything that you don’t want to be more “artistically colorful”. Keep paper towels handy to wipe up spills. Use bleach-based cleaner promptly on things that get dye spills, like counter-tops.
If you need less than the 3 gallons that the Rit recipes suggest, be sure to divide down all of the other ingredients the same as the water is divided down. It’s helpful to measure the dye in tablespoons for small batches: 1 cup = 16 tablespoons, 1/2 cup = 8 tablespoons, 1/4 cup = 4 tablespoons.
I added a second part to my procedure, which was to use Rit Color Stay Dye Fixative in a hot water bath for 20 minutes after the dyeing and rinsing process. I haven’t tried dyeing socks without it, but I can say that after a few washes, I haven’t seen any evidence of dye running out of the socks and onto my other clothes. Since I’m only going to do the dyeing process once, I decided to take the extra time. This way I have some extra insurance and piece of mind that I did all I could to keep the dye in place.
To make Olive Green Rit recommends: 1/2 cup (8 tbsp) Rit Dark Green, 1/4 cup (4 tbsp) Rit Dark Brown, 3 gallons of water for 1 pound of cotton clothing.
To make the best Olive Green for my mercerized socks, I used: 1/2 cup (8 tbsp) Rit Kelly Green, 1/8 cup (2 tbsp) Rit Dark Brown, 3 gallons of water for 1/3 pound of cotton clothing (about 2 pairs of Gold Toe Cotton Fluffies).
I might have made the standard Rit Dark Green / Dark Brown recipe work and be a lighter color by using more socks in the same amount of dye mixture, but I was worried that the hue would still look more navy blue than dark green, even if the darkness changed.
All the Gory Details
See this page to see my “lab notes”.