
Paperspace How-To
- Paperspace is a low-cost alternative for running ML algorithms on GPUs in the cloud
- Being a newer cloud computing platform, some of the documentation hasn’t caught up with new functionality
- This post helps you to use Paperspace effectively
Introduction
I have a very fast computer, but it’s unfortunately without an NVIDIA GPU, making it CPU-fast but not fast for purposes of Machine Learning algorithms.
I thought about building my own computer, which is possible for about $1000 and up. With even a medium compute utilization (percentage of time spent computing per day), this can be cost effective [See Choosing Your Deep Learning Infrastructure: The Cloud vs. On-Prem Debate ] However, because I didn’t want to have to manage more hardware, put down the up-front costs, and am not sure how fast a machine I will ultimately want to build, I decided for now to start running my ML experiments in the cloud.
In investigating the available cloud ML compute providers, as of today there seems to be a rough consensus that people use the following:
- Traditional Cloud Providers
- Google Cloud Platform
- Amazon Web Services
- ML-Specific Cloud Providers
- Paperspace
- FloydHub
The traditional Cloud Providers are generally higher cost, and FloydHub seems to have a lot of collaborative and IDE features I didn’t want. So, since what I really wanted was just raw compute power that I could submit code to, I chose to pursue running my experiments on Paperspace.
This post is a description of how to get work done on Paperspace if you want to use it a compute farm for your ML python code.
Using Paperspace
The ML-specific portion of the Paperspace cloud offerings is called Gradient. For the rest of this post I’ll be describing how to make it work.
Choose a Machine Type
The Gradient machine offerings are split between East Coast and West Coast.
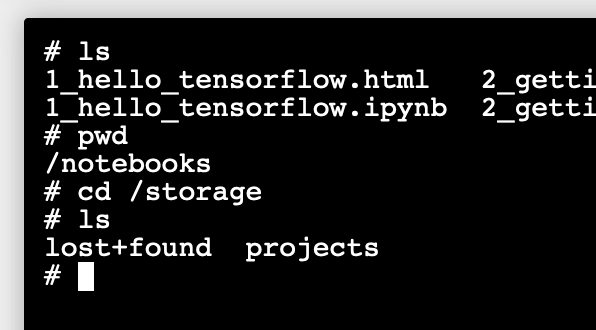
The two sets of machines use the same path for persistent storage, /storage,
but two different actual storage spaces. Files put in East Coast /storage
will not show up in West Coast /storage and vice-versa.
This Paperspace doc on Persistent Storage describes it in more detail. Note that specific machine types change frequently and descriptions in the docs about which the machine types belong to a particular region frequently miss newer machine types.
Choose a Docker image (or create one)
One of the key things you’ll need for a compute job is a Docker image with most or all of the resources needed for your job. You can install things as part of your job script, but it’s much more efficient to have a prebuilt Docker image containing all of your requirements. (It’s also faster–you’re paying for time!)
Docker’s central repository of images is the Docker
Hub, which Paperspace command syntax makes easy to
use. To specify a Docker image from Docker Hub, you may omit the name of the
docker hub URL and just use a label of the form \<namespace\>/\<image_name\>:\<tags\>.
All of the Gradient machines are based on Ubuntu 16.04. So any Docker image you use should be based off of Ubuntu 16.04. Not so coincidentally, all Tensorflow Docker containers are currently based on Ubuntu 16.04, so if you’re using Tensorflow, starting with a Tensorflow Docker image is an easy choice.
Docker’s good documentation on
creating your own docker image is very useful. Paperspace also has a good
tutorial about creating images: Creating & Using Custom Containers with
Notebooks.
The basic idea is to create a Dockerfile that starts with a FROM keyword
describing a Docker image that is the closest to what you want, and follow it
in the Dockerfile with everything additional you wish to install in your
image. Once you have an image that contains everything your code needs,
upload it to the Docker Hub, and you’ll be able to use it for any Paperspace
job.
Use the Paperspace CLI for access
There are two flavors of command-line (CLI) utilities provided by Paperspace to control and monitor jobs:
paperspace, referred to as “the Paperspace CLI”, compiled from paperspace-node- paperspace-python.
paperspace-python sounds as though it should be conveniently specific to python scripts. But in reality it is a less mature tool (as of March 26, 2019) and really you should use the Paperspace CLI. It has a much more complete and robust operation than paperspace-python. The paperspace-node implementation seems to be the reference for Paperspace CLI access.
Installing the Paperspace CLI
You can install the Paperspace CLI in a few different ways. The easiest ways are:
- Download a binary directly from Paperspace
- If you have a Mac with Homebrew installed, you can use my Homebrew tap.
brew tap itsayellow/paperspacebrew install paperspace-cli
Prepare your login to access Paperspace through the CLI
See Getting Started in Paperspace’s docs to prepare your login. This involves fetching your API key, which will be stored in your environment to allow you to access Paperspace through your CLI in the future. You’ll need to login through the CLI to your Paperspace account to retrieve your API key only once, or until you specifically “logout”. Logging in through the CLI stores your login API KEY in ~/.paperspace/config.json and it stays there until you logout through the CLI.
paperspace-node implements what paperspace simply calls the “Paperspace API” and the commands for the paperspace-node CLI are synonymous with the Paperspace API. Here is the full documentation for the Paperspace API.
Get your data onto the cloud persistent storage
Before you run your job, you’ll need to put any needed data into Paperspace’s persistent storage in the same Storage region as your Machine type (Either East Coast or West Coast.) The easiest way to upload arbitrary files is to use a Jupyter notebook, which is easy to spin up using Paperspace’s web console. Go to “Notebooks” under “Gradient” on the sidebar of the Paperspace web console, click “Create Notebook”, pick basically any public container, select the cheapest machine type in the proper storage region. You can get a current listing of machine types and which storage region they belong to on your local computer using the CLI, with:
paperspace jobs machineTypes
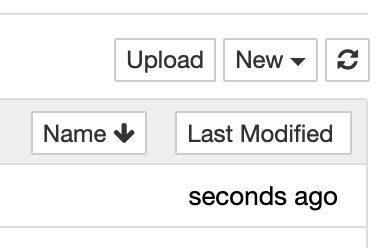
Once you start your Jupyter notebook and open it, simply click on the “Upload” button, which will open a File Open dialog where you can specify a local file to upload.
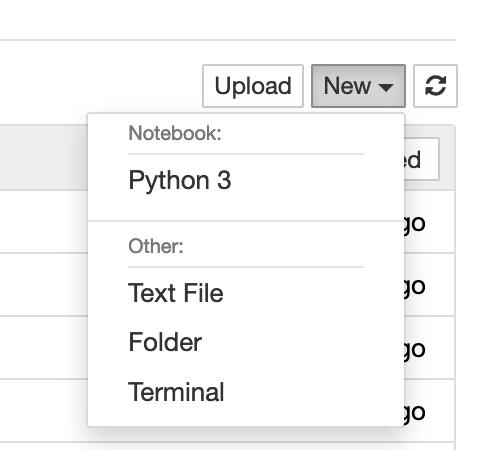
Another handy tip: If you need shell access to do any housekeeping like unzipping zip files, etc., Jupyter Notebook also has a Terminal that you can open and use in your web browser. Open from the “New” pull-down menu.
Note: you may need to install any utilities you need to use in the Terminal
with apt-get install.
So simple!
Create a script to run your code
To run a python script with the Paperspace CLI, first create a bash script that will run on the remote machine. The last line should invoke python and your script, e.g.
python3 myscript.pl my-arg --my-switch1
Before this line you can put any shell commands you need to execute to prepare
your environment for the python script. (e.g. apt-get install ... or
pip install ...)
I usually call my script cmd_paperspace.sh.
Assemble your CLI command to launch your compute job
Now it’s time to compose a Paperspace CLI command to launch your job on the Paperspace cloud. I like to create a shell script to do this. That way I can make sure that all of the options are always set properly.
You can call your script something like do_paperspace, and write a script
like the following:
#!/bin/bash

# send job to Paperspace, using Paperspace CLI
paperspace jobs create \
    --container  tensorflow/tensorflow:latest-gpu-py3 \
    --machineType K80 \
    --command ./cmd_paperspace.sh \
    --project my_experiments \
    --ignoreFiles "venv"
The above command
- Uses the Docker image tensorflow/tensorflow:latest-gpu-py3 from the Docker Hub
- Sends the job to a “K80” machine
- Runs the command
cmd_paperspace.shon the remote machine.cmd_paperspace.shis the bash script we wrote in the previous section. - Puts this job under project “my_experiments”. Experiments can be set and viewed on the Paperspace web console
- Ignores the directory
venv, where I have my virtual environment for my python script setup locally.
paperspace jobs create will also by default zip up your current local
directory, send the zip file to the remote host, and use the unzipped directory
as the run directory of your remote job. (This is also why it will be able to
find and run cmd_paperspace.sh.) Thus, if you have very large files in your
current directory or a subdirectory, make sure to put those files/directories
in the --ignoreFiles list, separated by commas, so they are not sent. This
method of zipping up the workspace will fail if the size of the zip file gets
too large.
When your do_paperspace script is written, run it on your local machine. It
should start your job running on a Paperspace machine if all goes well.
Supervise / Monitor your job
Monitor you Gradient Compute jobs and resources from the Paperspace web console or via the CLI. For a list of all jobs, current and past, view the jobs section of the web console.
Advanced notes: Accessing your job via the internet
If your job has network ports that you might want to access while it is running, you can access it from the internet.
The public DNS address for your Paperspace job is <jobId>.gradient.paperspace.com .
When submitting your job, add a --port option to your paperspace jobs
create command to expose any ports to the outside world. The format is
--port <external port>:<internal port> where <external port> is the port
number as viewed from the internet, and <internal port> is the port number as
seen by the job. If something of your code has a port to access, call that
port the <internal port>, and select an <external port> greater than 1023
to access it from the outside world. See Public IPs and Port
Forwarding